How Can You Stop a Bias-Bound Armhole From Puckering?

Table of Contents
A puckered bias-bound armhole usually means the binding, garment edge, and lining are not traveling around the curve at the same rate. With rayon, the problem is especially visible because the fabric is fluid and easily distorted. The fix is not simply to pull harder or use more pins: stabilize the armhole if needed, shape the bias tape without stretching it during stitching, control seam bulk, and press the curve into place before the final topstitching.
For bias tape armhole puckering, begin by checking whether the puckers are caused by too much binding length, too little binding length, or a distorted armhole. Those problems look similar from the outside, but they require different corrections.
A user in a Reddit sewing discussion described having trouble getting a rayon garment and lining to sit flat at the armhole. That combination is a useful example: rayon and a lining can shift differently under the presser foot, while bias tape adds a third material with its own stretch and recovery.
Diagnose the pucker before unpicking
Lay the armhole flat without pulling it open. Then look at the direction of the distortion.
If the garment edge looks wavy or rippled
The bias tape was probably stretched while it was sewn on, or the rayon edge was stretched by handling, pinning, or feeding through the machine. Bias-cut tape has natural give, which helps it bend around a curve, but it can also become longer when pulled. Once the tape relaxes, it can force the armhole edge into waves.
Unpick the affected section and compare the binding to the garment edge. If the tape is visibly longer or the garment edge looks stretched, remove the tension rather than trying to press the ripples away.
If the binding pulls inward and the armhole will not lie flat
The tape may be too short for the curve, or it may not have been shaped before installation. A concave curve such as an armhole needs the binding to follow the curve rather than fight it. Some sewing methods use slight, controlled ease in the tape around the curved section so it can sit flat; a tutorial on smooth armhole facings notes that a small amount of eased fullness in the tape can prevent the binding from leaning outward or puckering.
The important distinction is this: shape or ease the tape deliberately while pinning, but do not continuously pull it as it passes under the needle. Pulling during sewing is inconsistent and commonly creates a wavy result.
If the puckers appear only after the binding is turned inside
The seam allowance may be too wide, too bulky, or unable to spread around the curve. The binding can look smooth before turning, then buckle after it is folded over because the enclosed layers have nowhere to go.
This is often the likely issue when a lined rayon garment looks acceptable from the right side before finishing but develops small ridges after the lining or binding is turned.
Start with stable, correctly cut binding
Use true bias tape, cut at a 45-degree angle to the fabric grain if you are making it yourself. Tape that is off-grain will not bend evenly around a tight armhole curve. It may twist, resist the curve, or stretch unpredictably.
Match the binding weight to the garment. A heavy binding can create an obvious ridge on lightweight rayon. Extremely thin binding can also be difficult to control and may not cover the first stitching line consistently after it is folded over. If possible, make a sample using the same rayon, lining, binding, interfacing, thread, and seam allowance as the garment.
Prewash washable binding fabric before cutting it, particularly if the garment will be laundered. A binding that shrinks more than the garment can pucker after washing.
Stabilize a soft rayon armhole when it has stretched
Rayon armhole finishing is easier when the cut edge keeps its original shape. If the armhole has become longer, wavy, or fragile from fitting and handling, stabilize it before adding the binding.
Use a narrow staystitch just inside the intended seam line, following the curve without pulling the fabric. If the pattern calls for a lining, keep the lining and outer fabric carefully aligned at the armhole before treating them as one edge. Do not rely on adhesive basting tape alone to correct a stretched edge; it can hold layers together, but it cannot restore an armhole that has already been distorted.
Avoid stretching the rayon while pressing, lifting, or moving it from the ironing board. Support the curve rather than letting it hang off the edge of the board.
Shape the binding before sewing it to the armhole
Pressing is not only a finishing step. It can prepare bias tape to bend in the same direction as the armhole.
Open the tape if necessary, then use gentle heat and steam to curve it gradually. Let it cool before moving it so the shaped curve is retained. Pattern Scout Studio similarly recommends pressing bias tape into a curved direction and comparing its curve with the garment edge before attachment.
Next, pin or baste the binding around the armhole without forcing either layer. On a concave armhole, distribute any slight ease evenly through the curved area. The tape should not be taut like a straight ruler, but it should not be gathered into visible pleats either.
If you see little ripples in the tape while it is pinned, assess them carefully. Very slight, evenly distributed fullness can disappear into the seam as the curve is sewn. Large or concentrated ripples will become puckers, so reposition the tape before stitching.
Sew slowly and let the curve turn under the needle
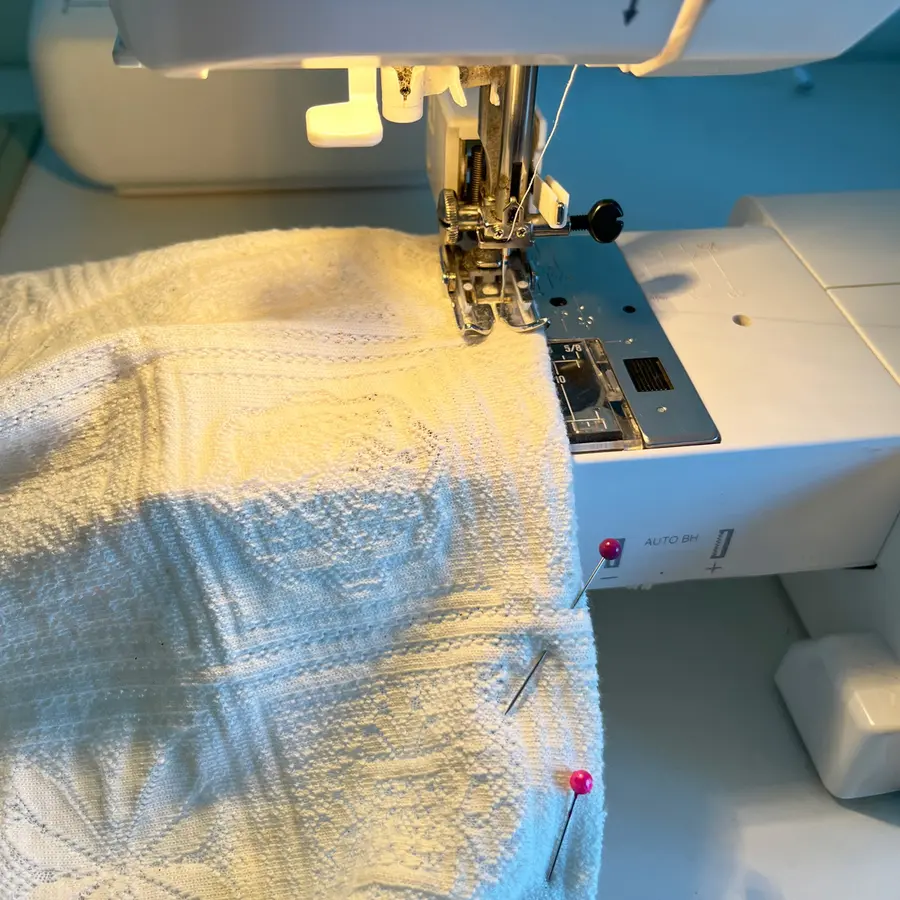
Use a shorter stitch length than you would for a long straight seam when sewing a tight curve. More closely spaced stitches provide better control and help the seam follow the armhole smoothly. Keep the layers supported on the machine bed and stop frequently enough to pivot the work gradually.
Do not pull the tape from in front of or behind the presser foot. Also avoid dragging the rayon. Either action can stretch one layer relative to the other. Guide the layers instead, allowing the feed dogs to move them through the machine.
If your machine produces puckering even when the layers are not being pulled, test the thread tension and needle on scraps. Lightweight rayon can show thread tension problems quickly. A sample will also reveal whether the lining and outer fabric feed at different rates; hand basting may be more reliable than pins for especially slippery combinations.
Grade and clip before turning the binding
After sewing the first binding seam, reduce bulk before turning. Grade the seam allowances so the enclosed layers are not all the same width. Keep enough allowance to preserve seam strength, but remove unnecessary thickness where the binding will fold.
Then clip into the curved seam allowance at regular intervals, stopping just short of the stitching. The clips allow the seam allowance to spread around the armhole curve. A sewing tutorial on bias armhole finishes specifically recommends clipping the curve before folding the tape to the inside for the same reason curved facings and linings are clipped.
Do not clip through the stitching, and take extra care when the seam allowance is narrow. If the fabric frays heavily, make shorter, more frequent clips rather than deep cuts.
Understitch before the final fold
Understitching is one of the most effective ways to prevent lining puckering and binding roll. Press the binding away from the garment so the seam allowance is directed toward the binding. Then stitch close to the seam through the binding and seam allowance, without catching the garment body.
This anchors the seam allowance inside the binding and encourages the binding to stay on the inside of the armhole. It also reduces the chance that the lining or binding edge will creep outward after wear and washing.
After understitching, turn the binding to the wrong side, roll the seam slightly inward, and press the curve on a ham or another rounded pressing surface. Let the area cool fully before topstitching. Pressing while the garment is flat on a hard board can flatten or distort the armhole shape instead of setting it.
When to remove and redo the binding
Pressing can improve mild fullness, but it cannot reliably fix a binding that was sewn on stretched, too short, or badly mismatched to the armhole. Redo the section if any of these signs remain:
- The armhole edge forms repeated waves when relaxed.
- The binding pulls the armhole inward or creates drag lines into the bodice.
- Puckers are trapped in the seam rather than only visible at the fold.
- The lining and outer layer no longer match smoothly around the curve.
- The binding twists or changes width noticeably as it turns to the inside.
When redoing it, remove enough stitching to release the distortion rather than trying to repair only one pucker. Re-establish the armhole shape, staystitch if necessary, prepare a fresh or relaxed section of bias tape, and baste the curve before committing to machine stitching.
The reliable sequence is: preserve the armhole shape, use true bias tape, shape the tape before sewing, avoid pulling either layer under the needle, clip and grade the curve, understitch, and press over a curve. That sequence addresses the interaction between rayon, lining, and bias tape instead of treating puckering as a single machine-tension problem.
References
- How to stop puckering when doing bias tape armhole?. reddit.com. https://www.reddit.com/r/sewing/comments/1vweydi/how_to_stop_puckering_when_doing_bias_tape_armhole
- Sewing smooth bias tape facings for armholes: unlock the secrets!. youtube.com. https://www.youtube.com/watch?v=PN7-EHczLz4
- What Is Bias Tape and How Do You Use It? – B-Sew Inn. bsewinn.com. https://www.bsewinn.com/blogs/inspiration/what-is-bias-tape
- The best techniques to sew bias binding on armhole. facebook.com. https://www.facebook.com/DIYtipstale/posts/the-best-techniques-to-sew-bias-binding-on-armhole/754040276822551
- Bias Binding Tips for Smooth Installation – Pattern Scout Studio. patternscoutstudio.com. https://patternscoutstudio.com/blogs/tutorials/bias-binding-tips-for-smooth-installation
- Bias Tape Armhole Bubbling? Why the Bias Isn’t Stretched. tiktok.com. https://www.tiktok.com/@teaganjacobs.com/video/7511740790142422273
- How to cut and sew bias for a professional finish. facebook.com. https://www.facebook.com/groups/718769706121102/posts/1735163824481680
- Bias Tape and Bias Binding Explained – Remy Made. remymade.com. https://remymade.com/blogs/sewing/bias-tape