
How Do You Prevent Fabric Puckering at Turned Corners?
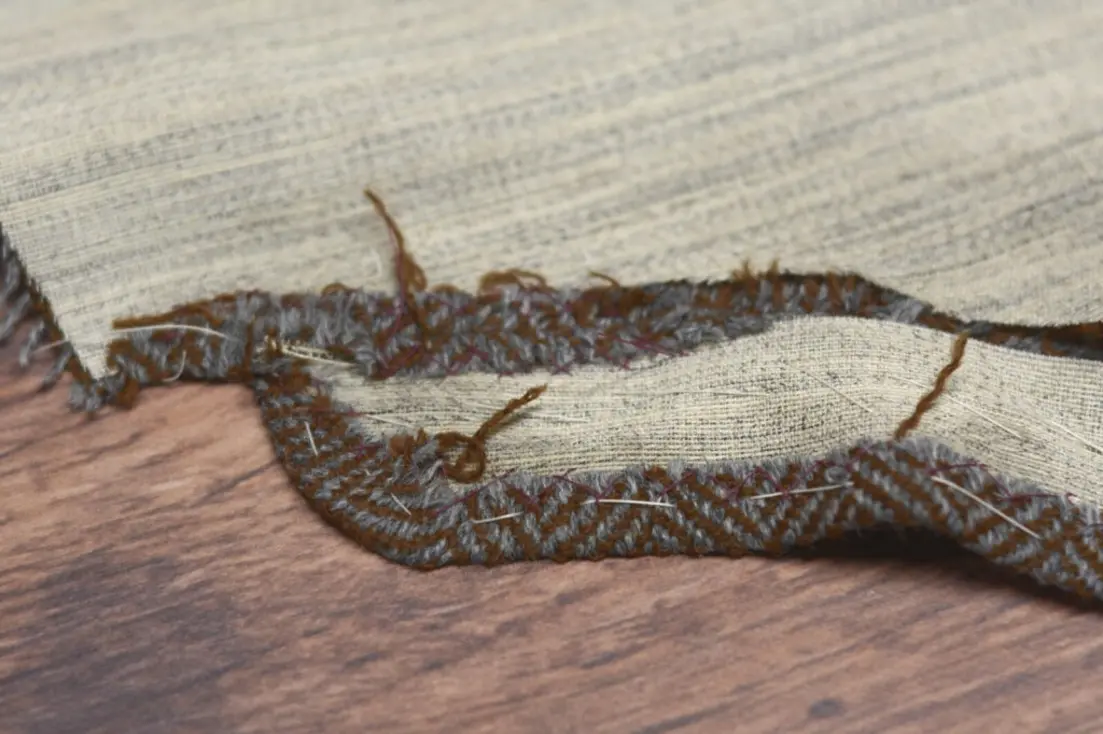
Table of Contents
Fabric puckering at corners usually happens because too much seam allowance is trapped inside the turned shape. After a collar, cuff, facing, or pointed corner is turned right side out, the extra fabric has nowhere to spread. It folds over itself, creating a rounded point, a lump, or small wrinkles along the edge.
The fix is to reduce the seam allowance before turning: trim bulky corners, grade layered allowances, clip concave curves, and notch convex curves. Do this after sewing the seam but before turning and pressing. The important rule is simple: cut close enough to release or remove excess fabric, but do not cut through the stitching line.
Start by identifying the shape you are turning
The right technique depends on the geometry of the seam allowance, not simply on whether an edge looks curved.
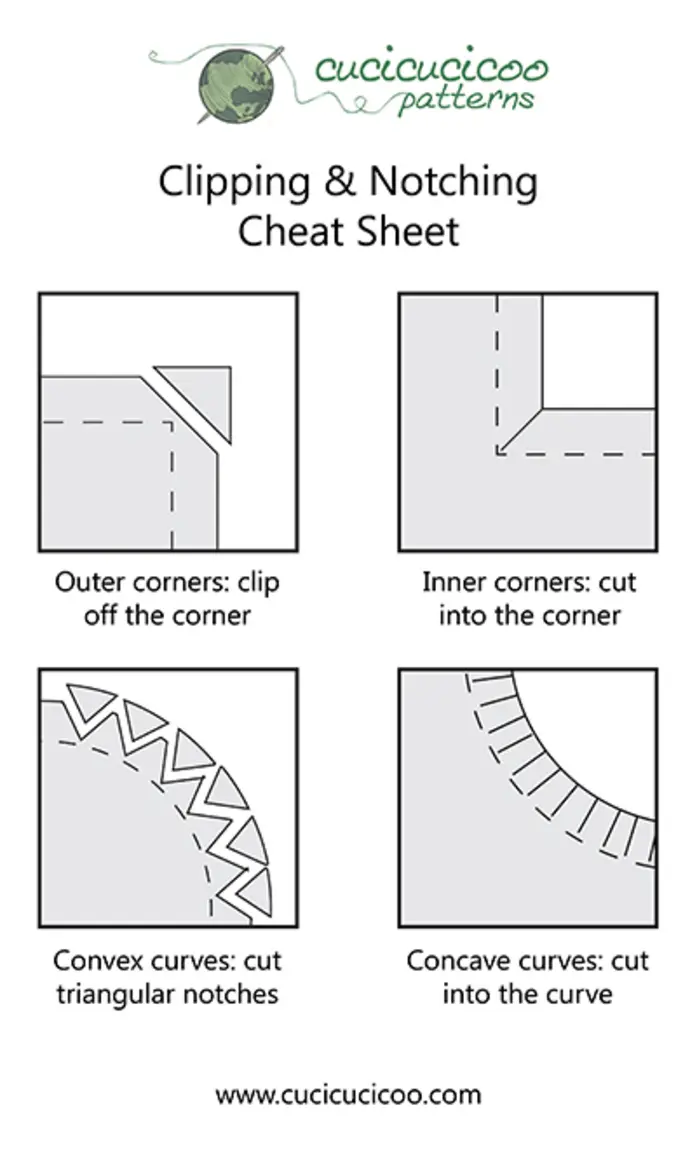
- Outward corner or point: A collar point, pointed cuff, or the outer corner of a rectangular flap has excess fabric concentrated at its tip. Trim it away diagonally.
- Concave curve: This is an inward curve, such as a facing around a neckline or the inside corner of a square neckline. The seam allowance is too tight to spread smoothly, so make small clips into it.
- Convex curve: This is an outward curve, such as a rounded collar edge or a curved pocket flap. The seam allowance is longer than the sewn edge and tends to stack up, so remove small wedges, called notches.
- Thick or multilayered seam: Even a straight seam can look ridged after turning when several layers end at the same point. Grade the layers to stagger their raw edges.
Source: cucicucicoo
A discussion about a bunched turned collar on r/sewing similarly identified excess seam allowance as the issue: the extra fabric crumples inside a point when it has no room to lie flat. That is the central problem these finishing methods solve.
Trim pointed corners and collar points
For an outside corner, begin by trimming across the seam allowance at a diagonal. This removes the triangular mass of fabric that would otherwise be forced into the point.
- Sew the corner accurately and stop at the intended pivot point.
- If the fabric frays easily or the point will receive stress, reinforce the corner with a short additional line of stitching inside the seam allowance before trimming.
- Trim the corner diagonally, leaving a small margin between the cut edge and the stitch line.
- For a very sharp collar point, trim the seam allowances along each side as well if they still overlap heavily near the point.
- Turn the piece right side out carefully, using a blunt point turner, chopstick, or similar smooth tool to ease out the point.
- Press the point rather than aggressively poking it. Forcing a sharp tool into the tip can break stitches or push a hole through delicate fabric.
A useful visual check before turning is to fold the seam allowances toward the corner along their seamlines. If the layers overlap substantially at the tip, more bulk may need to be trimmed. Ideally, the trimmed allowances meet or sit close together without creating a thick stack or leaving an unsupported hollow at the corner.
Grade seam allowances when layers create a ridge
Trimming removes material at a point; grading reduces the thickness of multiple layers along a seam. It is especially useful for lined collars, lapels, cuffs, waistbands, and facings, where two or more seam allowances would otherwise end at the same edge.
Grade by trimming one layer narrower than the next, parallel to the seamline. This creates stepped raw edges rather than one thick, visible ridge. In many turned garment sections, the seam allowance closest to the outside of the finished garment is left slightly wider than the layers beneath it. The goal is to distribute the thickness gradually.
Grade before clipping or notching when you need both operations. Reducing the overall width first makes it easier to see how much release or bulk removal is still needed.
Use restraint with lightweight fabric. Aggressive grading can make a fine fabric edge flimsy or show a distinct shadow through a pale garment. With thick fabrics, however, grading is often the difference between a crisp edge and a visibly padded one.
Clip inward curves to let them spread
A concave curve needs clips: short cuts made from the raw edge toward, but not into, the stitching. Examples include a neckline facing, an armhole facing, or an inside corner.
Without clips, the seam allowance is too short to open around the larger turned curve. It pulls against the seam and creates puckers. Small, evenly spaced clips let the allowance fan outward after turning.
Make each clip roughly perpendicular to the seamline. Keep the cuts shy of the stitches so the seam remains intact. A tighter curve needs more frequent clips than a gentle curve; adding more shallow clips is safer than making one cut too deep.
For an inward square corner, make one careful diagonal or angled clip toward the corner, again stopping before the stitch line. This releases the tightest area so the corner can turn cleanly.
Notch outward curves to remove excess bulk
A convex curve needs notches, which are small wedges cut out of the seam allowance. Rounded collar edges, scallops, and curved flaps often benefit from notching.
Unlike clipping, which allows an allowance to spread, notching removes fabric so the allowance does not overlap itself when turned. Cut small V-shaped wedges at intervals around the curve, leaving the stitches untouched. The wedges will close toward one another when the seam is turned, allowing the curve to lie flatter.
Do not confuse notches with pattern-matching notches. Here, a notch is a wedge removed from the seam allowance after stitching; it is not a small mark used to align pattern pieces before sewing.
Turn and press without creating new distortion
Good trimming can still look poor if turning and pressing are rushed. First, gently work the seam open with your fingers. Use a blunt tool to define a point or smooth a curve from the inside, but avoid stretching the fabric or driving the tool into the seam.
Then press in stages. Press the seam allowances open if the construction allows before turning. After turning, roll the seam lightly between your fingers so it sits exactly at the edge, then press from the appropriate side. A point press or other narrow pressing surface can support collar points and shaped edges without flattening the rest of the garment.
If the finished edge rolls toward the lining or facing, the issue may not be clipping alone. Pressing the seam allowances in the intended direction and understitching a facing or lining, where the pattern construction permits it, can help hold the seam inside the garment.
Avoid the cuts that damage the seam
The main risk is cutting through the stitching. Once that happens, the seam can open, fray, or develop a weak spot at exactly the location that needs to look clean.
Avoid these common mistakes:
- Trimming a point so closely that the seam allowance has no support.
- Cutting one deep clip instead of several smaller clips around a tight curve.
- Notching an inward curve when it needs clips to spread.
- Leaving all layered seam allowances the same width in a thick collar or cuff.
- Turning a sharp point with a sharp object that punctures the fabric.
- Pressing a bulky seam flat without first removing or distributing the excess allowance.
When in doubt, test the method on a fabric scrap with the same number of layers. Sew a small point or curve, trim it, turn it, and press it. That quick sample reveals whether your fabric needs more grading, closer clips, smaller notches, or a less aggressively sharp point.
A smooth turned corner is not created by pressing alone. It starts inside the garment, where the seam allowance must be reduced enough to fit the shape it is being asked to form.
References
- How to Clip Corners Sewing: Pro Tips for Perfect Results. sewingtrip.com. https://sewingtrip.com/how-to-clip-corners-sewing
- Clipping Corners Properly | Video - Threads. threadsmagazine.com. https://www.threadsmagazine.com/2019/03/22/clipping-corners-properly-video
- Clipping And Notching Seam Allowances Correctly - Easy Peasy Creative Ideas. theseamanmom.com. https://theseamanmom.com/clipping-and-notching-seam-allowances
- Clipping and Notching - How to Sew Perfect Curves & Corners. youtube.com. https://www.youtube.com/watch?v=X75A92K5QFw
- Clipping Curves Sewing - Get Flat Seams Every Time. lavalsdestissus.com. https://lavalsdestissus.com/clipping-curves-sewing-get-flat-seams-every-time
- Grading, Clipping, and Notching – The (not so) Dramatic Life. thenotsodramaticlife.com. http://thenotsodramaticlife.com/techniques-and-tips/grading-clipping-and-notching
- Clipping Corners and Curves: Sewing Guide for Smooth Seams | TREASURIE. blog.treasurie.com. https://blog.treasurie.com/clip-corners-curves
- Clipping and Notching. seamwork.com. https://www.seamwork.com/sewing-tutorials/clipping-and-notching